It’s much easier than you think.
Besides, it can be one of the most useful skills for any digital marketer to know.
You can include GIFs into your social media marketing strategy, share them on your blog posts, send them out in your email, or just make them for fun.
Whatever the case, knowing how to make a GIF might just become your new favorite hobby.
In this guide, we’ll break down a few different strategies to make a GIF. Even if you completely lack design skills, you can easily follow these steps to create your own super-engaging GIF.
But before that, why are GIFs so important for your content marketing anyway?
Why Learn to Make a GIF?
Everyone loves a GIF. They’re fun and engaging forms of content that grab more attention than a still image but require less focus than a video.
You can use GIFs everywhere. They can be added to your Instagram Stories, placed in your newsletter, posted on social media, included in your web pages, blog posts, and anywhere else where you place visual content.
Creating custom GIFs is a great way for businesses to produce a new form of content. GIFs attract attention, your audience will love them, and they will help you gather a lot of engagement.
And by knowing how to make a GIF yourself, your GIFs will always be 100% original.
Top 5 Instant Methods to Create a GIF
1. How to Create a GIF With Photoshop
There are two ways to make a GIF in Photoshop. You can either put together a string of photographs or use a video to make a GIF.
Using Photos to Make a GIF
Once you have a series of photos, you can put them together to create a short video GIF. Here’s how:
Step 1: Organize your photos for your GIF. Each photo will be one frame of your GIF. You might need about 20 photos for detailed GIFs. Name each photo in the order that you will use them in the GIF (1, 2, 3, and so on).
Step 2: Open Photoshop and navigate to File > Stack > Load Files. Select Browse, then choose the photos, or “layers”, that you want to use for your GIF. Select all of your photos.
Step 3: Upload all the files (your photos) on the Load Layers screen in numerical order and click OK.
Step 4: Navigate to Windows > Timeline. A box will appear under your first image saying Create Video Timeline. Select this and choose Create Frame Animation.
Step 5: Click on the hamburger menu at the top right of the Timeline panel. Click on Make Frames From Layers. Your animation frames will now be displayed in the Timeline panel. You can drag the frames to create the correct sequence.
Step 6: Select Forever in the dropdown menu left of the play button. Hit the play button to see what your GIF looks like.
Step 7: If you are happy, click File > Export > Save For Web (Legacy). Select GIF 128 Dithered under the preset menu.
Step 8: Change the Colors setting to 256. Now your GIF is ready. Select Preview to test it out, and click Save when you’re happy.
Using a Video to Make a GIF
Step 1: Start by shooting a short video. Navigate to File > Import > Video Frames to Layers.
Step 2: Now select the portion of the video you want to turn into a GIF. This should be only a few seconds long.
Step 3: Select how many frames to import. You don’t have to import every single frame, 1 frame out of 3 works well. Now your video file has been converted into layers.
Step 4: If you are happy, click File > Export > Save For Web (Legacy). Select GIF 128 Dithered under the preset menu.
Step 5: Change the Colors setting to 256. Now your GIF is ready. Select Preview to test it out, and click Save when you’re happy.
2. How to Make a GIF With Canva
You can also make a GIF in Canva. This is a great option if you don’t have Photoshop or aren’t very technical. Let’s see what the process looks like.
Step 1: Create or import a new design in Canva. This will be the foundation for your GIF. You can add video, or use Canva’s own animated elements to give your design life.
Step 2: When your design is ready, click Download and select GIF.
Step 3: Now just click Download and your GIF is ready.
3. How to Create a GIF With Giphy
Giphy is the most popular destination to find GIFs, and it’s also a popular place to create your own. Here’s how to do it.
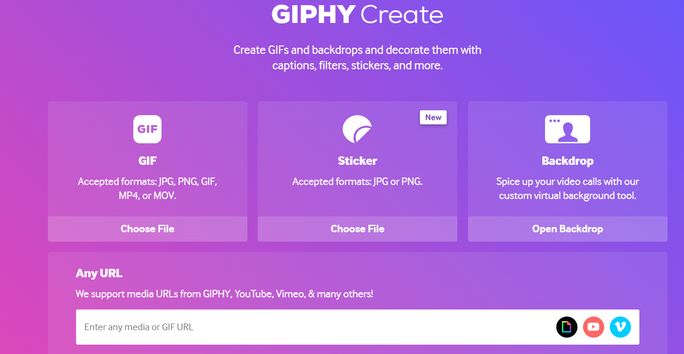
Step 1: Go to Giphy.com and click Create. Now you have four different options for creating a GIF. You can create a GIF using photos or a video, you can create a sticker using images, you can create a custom virtual background, or you can create a GIF using a YouTube video. We’ll be doing the latter.

Step 2: Paste the address of your video in the URL bar. Choose which portion of the video you want to turn into a GIF and set how long you want this to be.
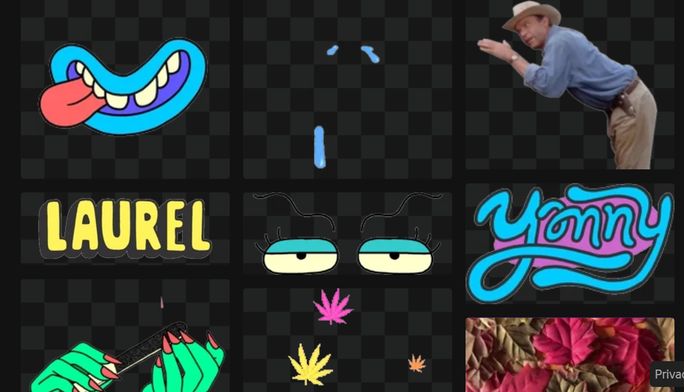
Step 3: Now you can add extra elements to your GIF, like filters or stickers. This step is completely optional.
Step 4: Add hashtags to help people discover your GIF. Make sure these hashtags match what users would search for to find your GIF.
Step 5: Click Upload to Giphy.
Voila, your GIF is on Giphy. Access the GIF and share it, get a code to embed it on your site, include it in social media posts, and much more.
4. How to Make a GIF on Your Phone
It’s really easy to make GIFs on your phone with apps like GIPHY Cam. Here’s what you can do:
Step 1: Open the app and record your GIF. You can take short bursts of photos or hold down the record button for a longer GIF.
Step 2: If you want, you can add extras like a filter, stickers, and text.
Step 3: Save your GIF.

5. How to Create a Screen Recording GIF
You can also make a GIF of your screen recording. This is a great idea if you want to demonstrate something visually, like if you’re writing a step-by-step guide.
Here’s how you go about it:
Step 1: Use an app like GIPHY Capture or GifCam (for this example, we’ll be using GIPHY Capture). Launch the screen recording app and you will see a recording overlay in the form of an outlined box.
Step 2: Pull this box over the area that you want to record. You can drag the corners of the box to enlarge the area.
Step 3: Press the record button on the frame to start recording, and press it again to stop. A thumbnail preview of your GIF will appear in the bar underneath the recording overlay.
Step 4: Once you have recorded your GIF, you can minimize the recording area. Now you have the option to customize your GIF. You can choose what type of loop the GIF will play at, set the frame rate, and choose the pixel size.
You can trim the GIF from each side by dragging the tabs. This menu also gives you the chance to add captions. Once your GIF is ready, click Calculate Size to determine the size of the GIF. Try to get it under 3 MB.
Step 5: Save your GIF. You can either save it to your device, or upload it directly to GIPHY’s archive.
6 Tips for Creating an Amazing GIF
Now that you know how to make a GIF, your creative opportunities are limitless. Before you go too crazy with GIF-making, here are a few tips and best practices to create engaging GIFs.
1. Make it eye-catching: GIFs are designed to attract attention and engage the viewer, so make them stand out. Keep them quick, and don’t be afraid to include bright colors. If you add text to your GIF, make sure the text is easy to read while the GIF plays.
2. Keep the GIF on a continuous loop: GIFs are short, and they’re fun to watch over and over. Keeping your GIF on an automatic loop will help the viewer to engage and enjoy the GIF even more.
3. Keep the GIF relevant: People love watching GIFs that they understand. The most popular GIFs are made from viral memes and content that everyone already knows.
So if you want your GIF to attract loads of attention, consider including a meme figure, a celebrity, a popular movie character, or anything else that is well-known and relevant.
4. Use your GIFs sparingly: GIFs are great, but they also demand a lot of attention. Now that you know how to create a GIF, don’t abuse your new power! Never add too many GIFs too close together, and save them as a kind of special feature.
If you place too many GIFs on a single page, it can also cause that page to load very slowly, which won’t be good for the user experience or for SEO.
5. Start simple: When creating your first GIF, start with a few simple elements and build up from there. It might take some time before you become a complete GIF master, so don’t go too big too soon. Once you understand the basics of a few different movements and elements, you can always expand on that.
6. Have fun with it: GIFs are fun and often a bit silly. Don’t take making a GIF too seriously, and don’t worry about achieving absolute perfection. Instead, just focus on having fun with the GIF and getting creative. The more personality your GIF has to offer, the better.
Wrapping Up
Creating a GIF is fun and easy, and you can use this for so many different things. Original GIFs will take your marketing content to the next level. Whether this is through Instagram Stories or posts, email marketing, or even web and blog content, wherever you share them your audience will love them.
So if you’re looking for new content ideas, or are trying to make your existing content strategy more engaging, then why not try making a GIF? You’ll never look back.
Once you’re done creating GIFs, it’s time to share them with the world. If you’re sharing it as a social media post then schedule it in advance with SocialPilot.
Not only scheduling your posts, but it also solves all your social media marketing problems. From performance analysis to content curation to team collaboration, it’s an all-in-one solution to all your social efforts.
Go ahead, try its free trial today!


