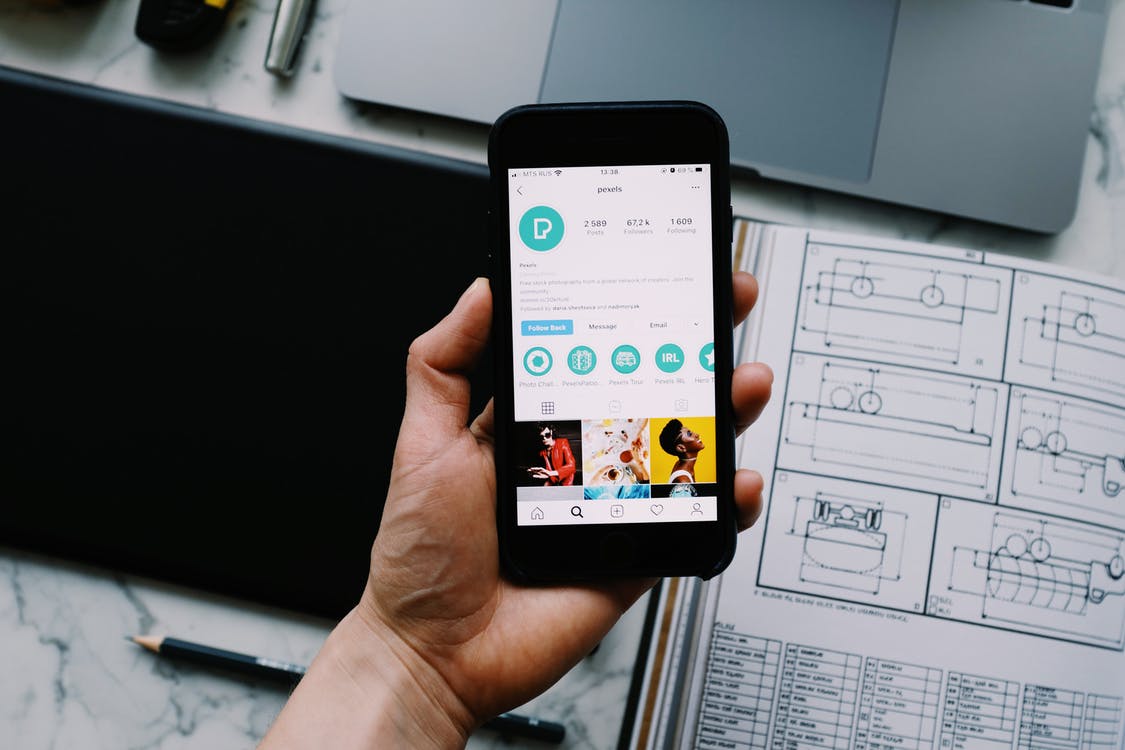
Instagram is a powerful platform for growing your business. With over 500 million daily active users, and over 1 billion monthly users, it’s a great tool for business owners, content creators, and marketers to garner the attention of their target audience.
The blue checkmark on Instagram opens up even more growth opportunities for your business by giving you additional exposure to new audiences. But, there are a few caveats to obtaining the status symbol.
Read on to discover everything you need to know about how to get verified on Instagram so you can enjoy all the benefits that come with having the blue check on your profile.
Understanding Eligibility for the Blue Checkmark
For you to be eligible for Instagram verification, your account must meet the criteria below:
Your account has to be authentic: For Instagram to consider you for verification, your account must either belong to a real person or represent a registered business/entity.
Your Instagram account has to be unique: Instagram verifies only one account per individual or business, and your account has to be a unique presence. Exceptions are made for language-specific accounts. However, Instagram will not verify general interest accounts, including feature accounts, fan accounts, and meme accounts.
Your account has to be notable: This means that your Instagram account must represent a well-known brand or public figure. It must either be highly searched or featured in various news sources. Instagram doesn’t consider paid or promotional content associates for verification review.
The account has to be complete: You need to add a profile photo and a bio. Also, your profile must have at least one post in its feed. You can’t include “add me” links on your profile to any other social platforms. Furthermore, the blue verification badge is reserved only for celebrities and public entities, which means you can’t have a private Instagram profile.
In addition to meeting the above criteria, you also need to follow the platform’s Terms of Service and Community Guidelines.
How to Apply for Instagram Verification (Step-By-Step)
Although anyone can apply for the blue checkmark on Instagram, not everyone is approved. In order to increase your chances of getting verified, make sure you do everything outlined in the steps below:
Step #1: Log into Your Instagram Account
Your first step is to log into your account. If you own multiple Instagram accounts, make sure that you’re logging into the one that must be verified.
Step #2: Request Verification
Once inside your Instagram profile, follow these steps:
1. Tap the Menu button on the top right corner, then tap the Settings icon that resembles a little gear.
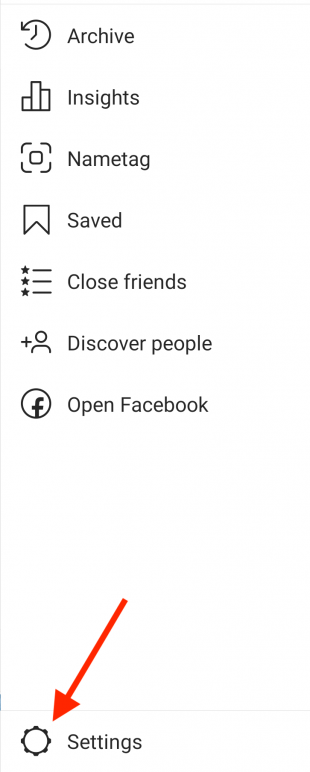
2. Near the bottom of the screen, tap the Account icon.
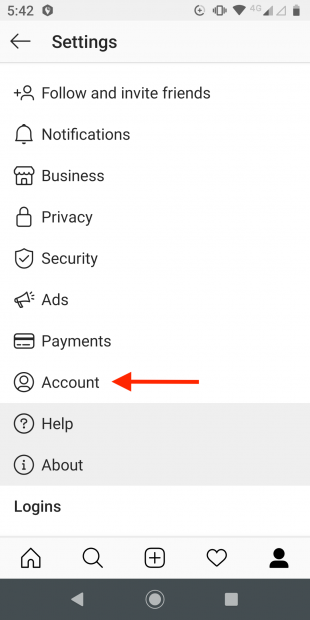
3. Near the bottom, you will find the Request Verification icon.
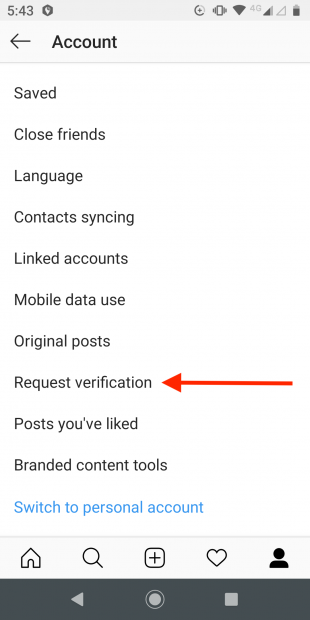
Step #3: Confirm Your Identity
You will need to confirm your identity before your account can be considered for verification. To do so, follow these steps:
1. Fill in all required details, such as your full name and professional name, as well as the correct category.
Full Name: Here you enter your legal name as it is shown on your government-issued ID.
Known As: Enter your company name or the name that you’re generally known as by your audience. If you use a middle name, or if you have a nickname that you go by, this is where you add that information.
Category: There are multiple categories to choose from. You must ensure that you pick the most accurate one for your account. Categories include:
- News or Media
- Sports
- Music
- Fashion
- Entertainment
- Government or Politics
- Business, Brand, or Organization
- Blogger or Influencer
- Other
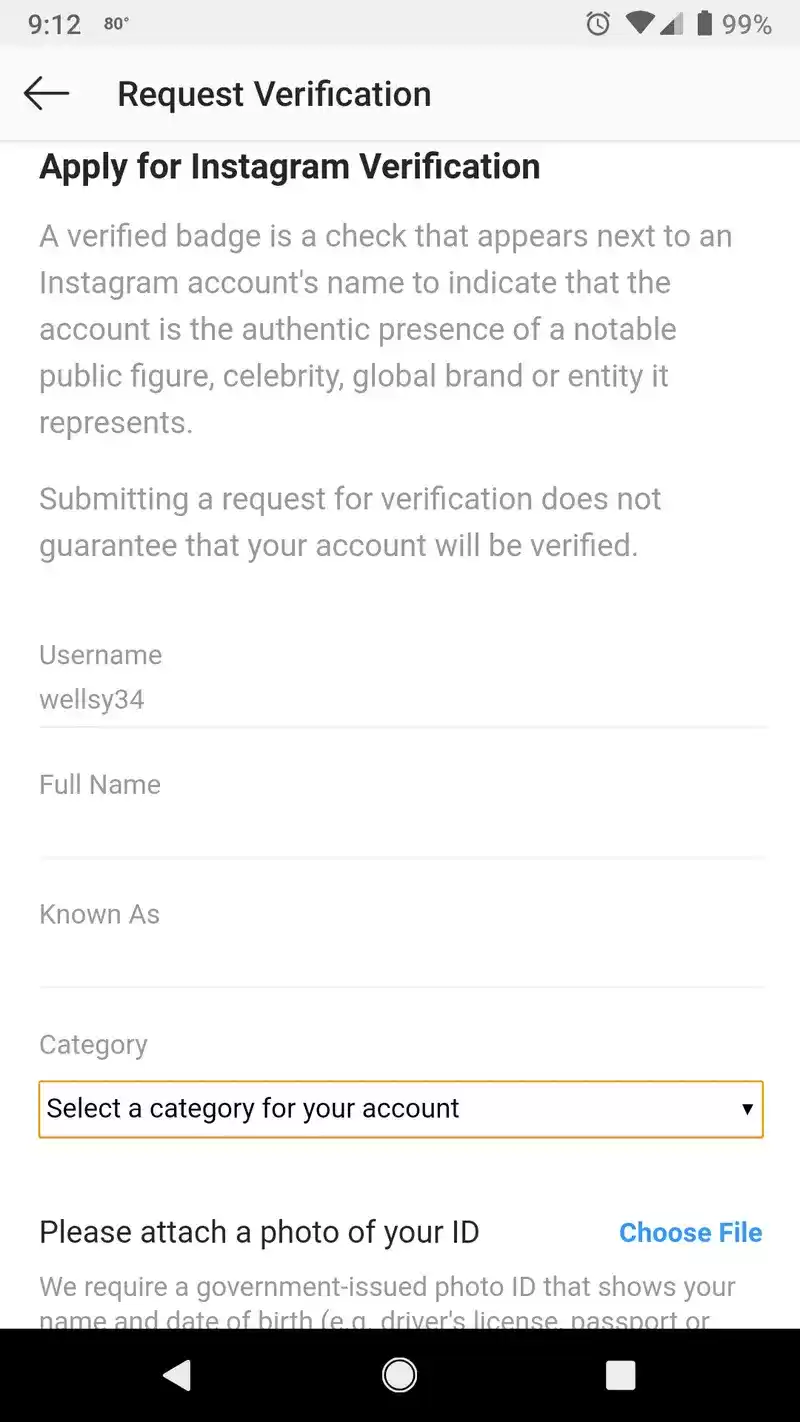
2. Upload your business documents and photo identification to the platform. Individuals can use a driver’s license, passport, or ID card.
Businesses can use utility bills with the company name on them, tax returns, or articles of incorporation. The name entered above must match the name on the uploaded documents.
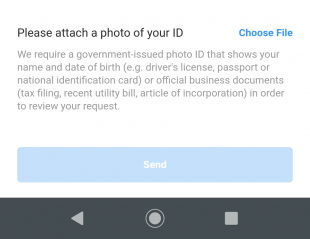
3. Once you’ve completed the application, tap Send, and that’s it!
Once your request has been reviewed, Instagram will let you know whether or not your application for verification has been approved. Typically, the official reply comes within a few days of submitting the application.
What to Do If Your Application Is Rejected
There are a myriad of reasons why Instagram might reject your application to get verified. The best thing to do under such circumstances is to find out why your application was denied and then use that information to help you improve your chances of getting approved the next time you apply.
You may have to make certain changes, such as:
Once you’ve made the necessary changes, you can apply again. You can only submit the next request 30 days after your first application was denied.
Important Note: If you provide any false or misleading information during the verification process on Instagram, your verification badge will be removed. The platform may also take further action or even delete your account.
That’s why it is vital to ensure that you’re completely honest and that you include only truthful, accurate, and relevant information during the process of verification. This includes:
- Using your real name;
- Choosing the proper account category;
- Using real photos and documentation for proof of identity.
Listed below are several other things that you can do to increase your chances of approval.
Ways to Increase Your Chances of Approval.
- Complete your bio and fill in all the required fields
- Get your name in the news by sending out media kits and press releases
- Optimize your presence online and make your name searchable to increase visibility
- Grow your Instagram following so you can be more notable on the platform
- Post regularly to make your presence more robust
- Increase engagement and get your followers involved to signal your authenticity
Conclusion
Getting the blue checkmark on Instagram comes with a lot of perks. Use the information outlined in this article to help you boost your chances of getting verified so you can start enjoying the benefits.
Do you meet the criteria for verification on Instagram? Let us know in the comments section below!


